Mecrisp-Cube for the STM32WB5MM-DK Discovery Board
Intro
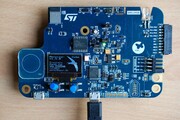
The STM32WB5MM-DK Discovery Board is not as cheep as the Nucleo Board but it
has plenty of peripherals on board: OLED display 128x64 pixel, 128-Mbit Quad-SPI NOR Flash Memory, temperature sensor, accelerometer/gyroscope sensor, Time‑of‑Flight and gesture‑detection sensor, digital microphone, RGB LED, infrared LED, and touch sensor.
Instant real-time programming with Forth.
Sources on GitHub (WB5M branch on Mecrisp-Cube)


- Other STM32WB Development Boards
- Flash Mecrisp-Cube application and Stack/FUS to the target
Features
The standard Mecrisp-Cube features like RTOS, Filesystem, USB, etc.- 63 KiB RAM dictionary
- 384 KiB Flash dictionary
- On board Serial Flash drive 0:, 1 MiB
- microSD drive 1: (needs external adapter)
- OLED display 128x64 pixel
- RGB LED
- temperature sensor
- accelerometer/gyroscope sensor
- Time-of-Flight and gesture/detection sensor
- digital microphone
- infrared LED
- touch sensor
Getting Started
These instructions will get you a copy of the project up and running on your local machine (STM32WB5MM-DK Discovery Kit) for development and testing purposes.Prerequisites
- STM32WB5MM-DK Dscovery Kit with STM32W5MMG module, STM32WB55 MCU (Cortex ARM M4) runs at a 32 MHz (the Bluetooth stack runs on a Cortex ARM M0+ core). ST-Link debugger/programmer is integrated on board.
- Terminal emulator application for PC, e.g.:
MecrispCubeWB5M.bin) or the util-binaryMecrispCubeWB5MUtil.bin) to the Discovery Board.
- Connect the Discovery Board USB ST-LINK to the PC
- Copy the binary (
MecrispCubeWB5M.binorMecrispCubeWB5MUtil.bin) to the USB mass storage DIS_WB5MMG
/dev/ttyACM0).
I set the putty terminal configuration to
- Implicit CR in every LF
- Local echo: Auto
- Local line editing: Auto
- Keyboard Backspace: Control-H
- Keyboard Function: Keys VT100
- Remote character set: CP850
Mecrisp-Stellaris RA 2.5.4 by Matthias Koch.

Mecrisp-Cube 1.5.0 for STM32WB Discovery, 63/384  KiB RAM/FLASH dictionary (C) 2022 peter@spyr.ch
  * Firmware Package STM32Cube FW_WB V1.14.1, USB-CDC, BLE Stack 5.3 (C) 2022 STMicroelectronics
  * CMSIS-RTOS V2 FreeRTOS wrapper, FreeRTOS Kernel V10.3.1 (C) 2020 Amazon.com
  * FatFs for internal flash and microSD - Generic FAT fs module  R0.12c (C) 2017 ChaN
  * tiny vi - part of BusyBox (C) 2000, 2001 Sterling Huxley

include 0:/etc/rc.local
23 5 / .[CR] 4  ok.
: hello ." World" ;[CR]  ok.
hello[CR] World ok.
Special Functions on Startup
USB-CDC is the default console.- Button 1
- CRS (Bluetooth Cable Replacement Service) is standard console
- Button 2
- UART is standard console
RGB LED as Status Indicator
The RGB LED displays the status- dimmed Green
- USB enumeration successfull
- dimmed Blue
- BLE connected
- flashing Red
- "disk" (serial flash or SD) write operation
- flashing Yellow
- "disk" (serial flash or SD) read operation
Additional Tools and Local Filesystem
Populate a microSD with the contents of sdcardls -l 1:[CR] drw- 0 2021-04-18T18:12:38 boot drw- 0 2021-03-21T18:47:52 etc drw- 0 2021-03-21T18:47:54 fsr drw- 0 2021-03-21T18:47:54 home drw- 0 2021-03-21T18:47:56 man -rwa 7219 2021-01-08T19:42:36 README.md ok.You can use the local CLI commands like
mkfs, mkdir and cp to create a filesystem on the serial flash and fill it with files and folders. But this is tedious job because I haven't yet implemented a recursive copy for MecrispCube. But there is prepared disk image
(for details see MicroSdBlocks#Serial_Flash) on microSD and the tool dd. You can copy the disk image to the drive 0: (this takes about 8 Minutes):
dd 1:/boot/fd-1MiB.img 0:[CR]
 ok.
mount 0:[CR]
 ok.
ls 0:[CR]
man                     fsr                     README.md               boot
etc                     home
 ok.
The Mecrisp have some tools bundled in its distribution e.g. assembler, disassembler, dump, float. I put those tools and some more into the folder
/fsr. With the "init.fs script" I compile my favorite ones into the flash directory (if you use the util-binarycompiletoflash[CR] ok. include /etc/init.fs[CR] init.fs Loading started RAM Dictionary: 392991 KiB utils.fs loading ... conditional.fs loading ... dump.fs loading ... disassembler-m3.fs loading ... float.fs loading ... threads.fs loading ... RAM Dictionary: 392981 KiB init.fs finished ok.For example, the word disassember is available now:
see dump[CR]
080405F0: B500  push { lr }
080405F2: F7C2  bl  08002A3E  --> cr
080405F4: FA24
080405F6: CF08  ldmia r7 { r3 }
080405F8: F013  ands r2 r3 #F
080405FA: 020F
080405FC: F847  str r3 [ r7 #-4 ]!
080405FE: 3D04
08040600: 2A00  cmp r2 #0
08040602: D000  beq 08040606
08040604: 3610  adds r6 #10
08040606: CF08  ldmia r7 { r3 }
08040608: F847  str r6 [ r7 #-4 ]!
Installing Development Environment
A step by step series of examples that tell you how to get a development env running Install the IDE STM32CubeIDEpsi@homer:~> git clone --branch WB5M https://github.com/spyren/Mecrisp-Cube Klone nach 'Mecrisp-Cube' ... remote: Enumerating objects: 1157, done. remote: Counting objects: 100% (1157/1157), done. remote: Compressing objects: 100% (620/620), done. remote: Total 3183 (delta 720), reused 934 (delta 525), pack-reused 2026 Empfange Objekte: 100% (3183/3183), 41.60 MiB | 6.96 MiB/s, Fertig. Löse Unterschiede auf: 100% (2100/2100), Fertig.Import the project into the IDE:
File -> Import -> General -> Existing Projects into Workspace -> Select root directory
Copy project into workspace
Browse to Mecrisp-Cube directory
Generate code from the STM32CubeMX
MecrispCubeWB5M.ioc file:
Project -> Generate CodeRestore changed source files
$ git status
{list of changed files}
$ git restore {files to restore}
Select the Build Configuration (Debug if you want to debug the project) and Build the project:
Project -> Build Configurations -> Set Active -> Debug/Release
Project -> Build Project

This work by Peter Schmid is licensed under a Creative Commons Attribution-ShareAlike 4.0 International License.


| I | Attachment | History | Action | Size | Date | Who | Comment |
|---|---|---|---|---|---|---|---|
| |
discovery.jpg | r1 | manage | 433.0 K | 2022-11-05 - 12:27 | PeterSchmid | |
| |
wbfeather.jpg | r1 | manage | 697.5 K | 2021-07-01 - 20:38 | PeterSchmid |
Topic revision: r13 - 2022-12-01 - PeterSchmid

Ideas, requests, problems regarding TWiki? Send feedback